

How to Get Started with Vibe Coding: A Beginner's Guide to Building with AI

What if you could build a website, an app, or even a game just by describing what you want in plain English? No memorizing weird symbols. No confusing error messages. No computer science degree required.
That's vibe coding, and it's completely changing who gets to build things with technology.
Whether you're curious about making your first website, want to build something for a school project, or looking to launch your first side project, this guide is for you. We're going to go from knowing absolutely nothing to having a real, live portfolio website on the internet. And we're going to do it together, step by step.
Let's get into it.
What Is Vibe Coding, Exactly?
In February 2025, a computer scientist named Andrej Karpathy (co-founder of OpenAI and former head of AI at Tesla) posted something on X (formerly Twitter) that blew up the internet. He described a new way of building software where you "fully give in to the vibes" and let AI write all the code for you.
He called it vibe coding.
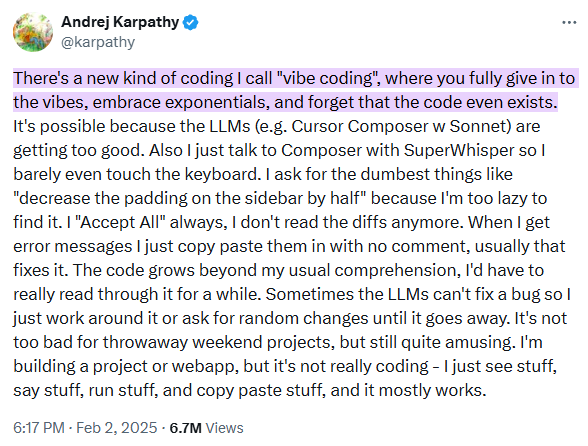 Screenshot: Andrej Karpathy's viral post on X where he coined "vibe coding" in February 2025.
Here's the basic idea: instead of learning a programming language and typing out code line by line, you describe what you want to build in normal, everyday language, and an AI tool writes all the code for you. You review the result, tell the AI what to change, and keep going until it looks right.
Think of it like this:
- Traditional coding: You learn a language (like Python or JavaScript), study the rules, and type every line yourself.
- Vibe coding: You tell an AI assistant "make me a blue website with my name in the center and a photo gallery below it," and it builds it for you.
The term got so popular that Merriam-Webster listed it as a trending term, and the Collins English Dictionary named "vibe coding" the Word of the Year for 2025. It's not a gimmick. It's a genuine shift in how people create software.
Why Should You Care?
Because vibe coding removes the biggest barrier to building technology: the learning curve. You don't need to spend months learning syntax before you can make something real. You can start building today and learn as you go.
Some real things people with zero coding experience have built using vibe coding:
- Personal portfolio websites to showcase their work
- Recipe apps to organize and share favorite meals
- Quiz games for friends or classmates
- Budgeting tools to track spending
- Social media dashboards for content creators
If you have an idea, vibe coding can help you bring it to life.
What You'll Need Before We Start
Before we jump in, let's make sure you have what you need. The good news? It's not much.
The Essentials
| What You Need | Details |
|---|---|
| A computer | Windows, Mac, or Linux. Any will work |
| An internet connection | You'll need this to download tools and for the AI to work |
| About 2 hours | That's all the time this walkthrough takes |
| Curiosity | The most important requirement |
What You Do NOT Need
- You do not need to know how to code
- You do not need to understand programming languages
- You do not need to be "good at math" or "good with computers"
- You do not need to pay for anything (we'll use free tools)
Got everything? Let's go.
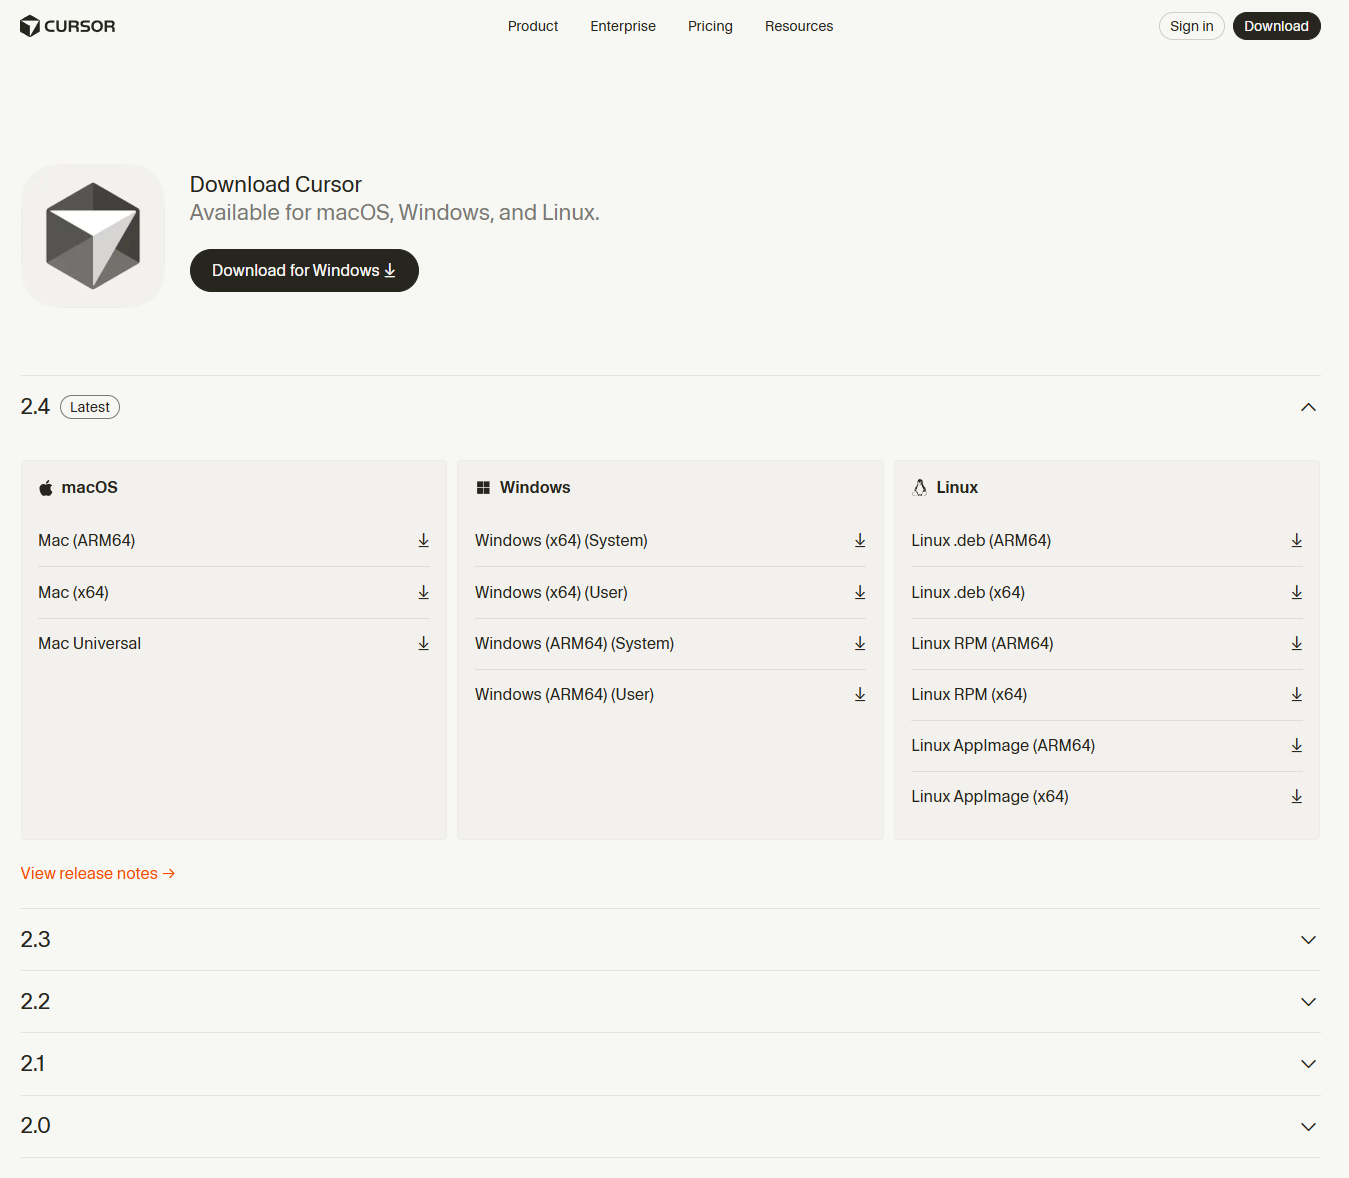
Step 1: Choose Your Tool
There are tons of vibe coding tools out there in 2026, but we're going to focus on the ones that are best for beginners and won't cost you a cent to start.
Our Top Pick: Cursor
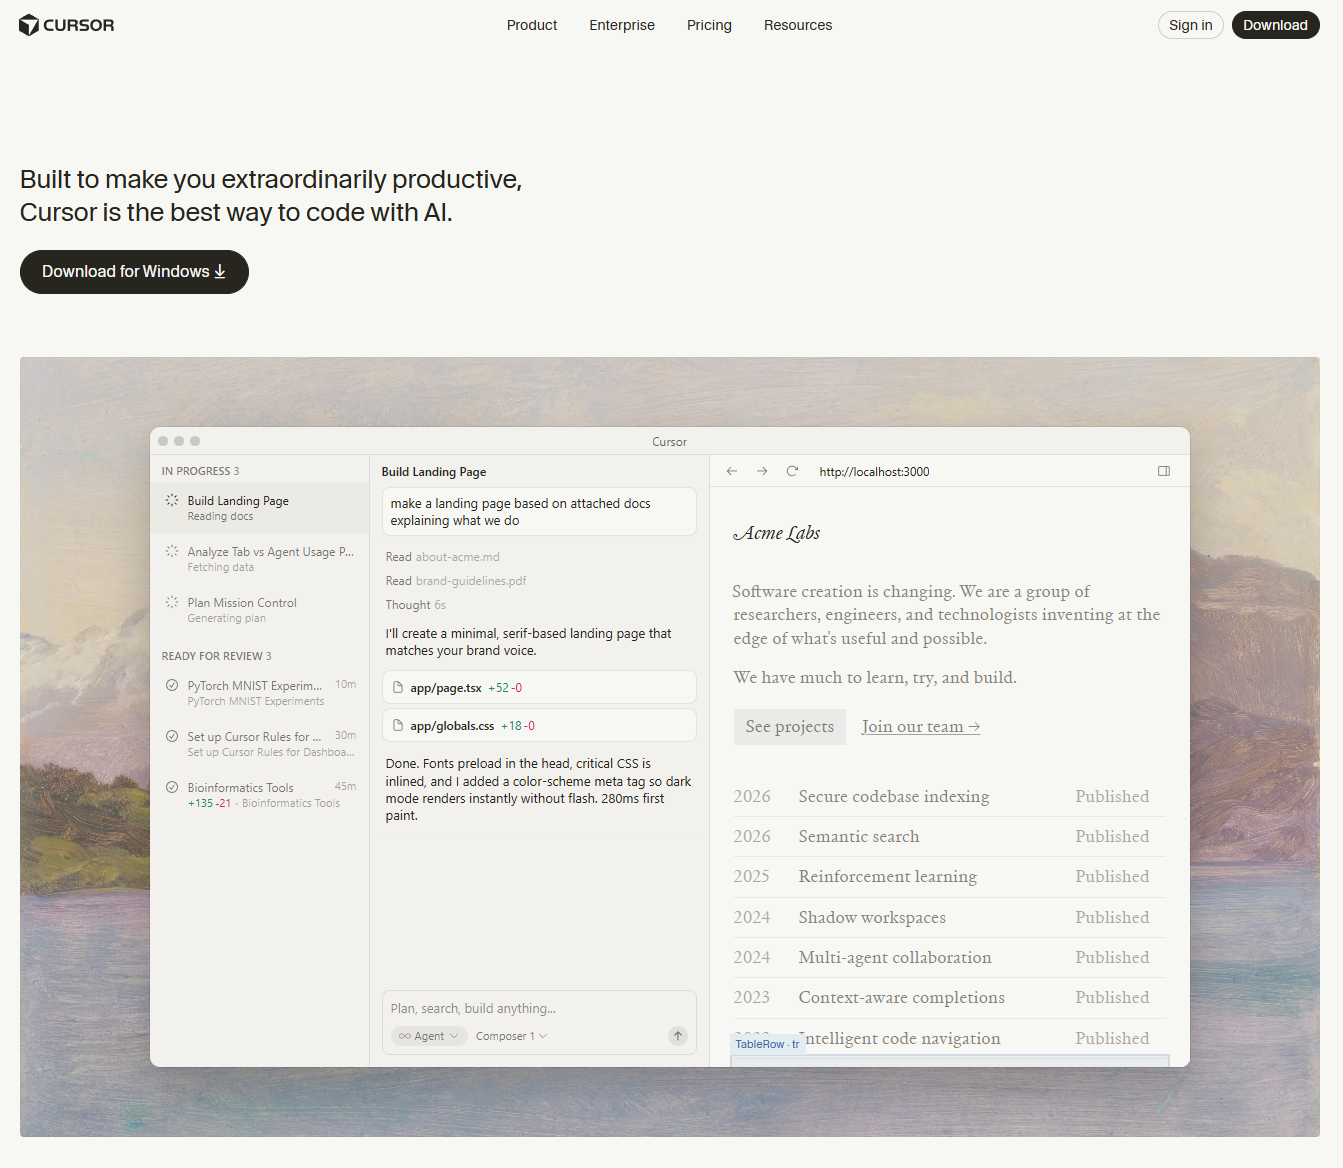 Screenshot: The Cursor website homepage at cursor.com. Click the big "Download" button for your operating system.
Cursor is an AI-powered code editor that's built on top of Visual Studio Code (the most popular code editor in the world). It has AI built right into it, so you can type what you want in plain English and it writes the code. Another powerful option worth knowing about is Claude Code, which runs in your terminal and is especially strong for developers who want deeper project context.
Why Cursor?
- It has a free plan (called "Hobby") that includes 2,000 code completions and 50 premium AI requests per month, which is plenty to get started
- It works on Windows, Mac, and Linux
- It has a visual editor where you can see your website as you build it
- It's what most people in the vibe coding community use
Download Cursor here: https://www.cursor.com
Alternatives Worth Knowing About
| Tool | Best For | Free? | Link |
|---|---|---|---|
| Cursor | Our main pick, full AI code editor | Yes (Hobby plan) | cursor.com |
| Bolt.new | Building in the browser, no download needed | Yes (limited) | bolt.new |
| Lovable | Visual app building, very beginner-friendly | Yes (5 credits/day) | lovable.dev |
| Windsurf | Another great AI code editor, clean design | Yes (free tier) | windsurf.com |
| Replit | Browser-based coding, good for Chromebooks | Free trial | replit.com |
| Google AntiGravity | Google's free AI IDE, extra limits for students | Yes (free) | antigravity.dev |
Tip for Chromebook users: If you can't install software on your computer (like if you're using a school Chromebook), Bolt.new and Lovable run entirely in your web browser with no download needed. You can still follow along with this guide using those tools.
For this walkthrough, we'll use Cursor since it gives you the most flexibility and is the tool you'll likely grow with as you get more experienced.
Step 2: Download and Set Up Cursor
Let's get Cursor installed on your computer. This takes about 5 minutes.
On Windows
- Go to cursor.com
- Click the "Download for Windows" button
- Open the downloaded
.exefile - Follow the installation prompts (just click "Next" through everything, the defaults are fine)
- When it asks if you want to import VS Code settings, click "Skip" if you've never used VS Code before
 Screenshot: The Cursor download page. Select your operating system and click download.
On Mac
- Go to cursor.com
- Click "Download for Mac"
- Open the
.dmgfile and drag Cursor to your Applications folder - Open Cursor from your Applications
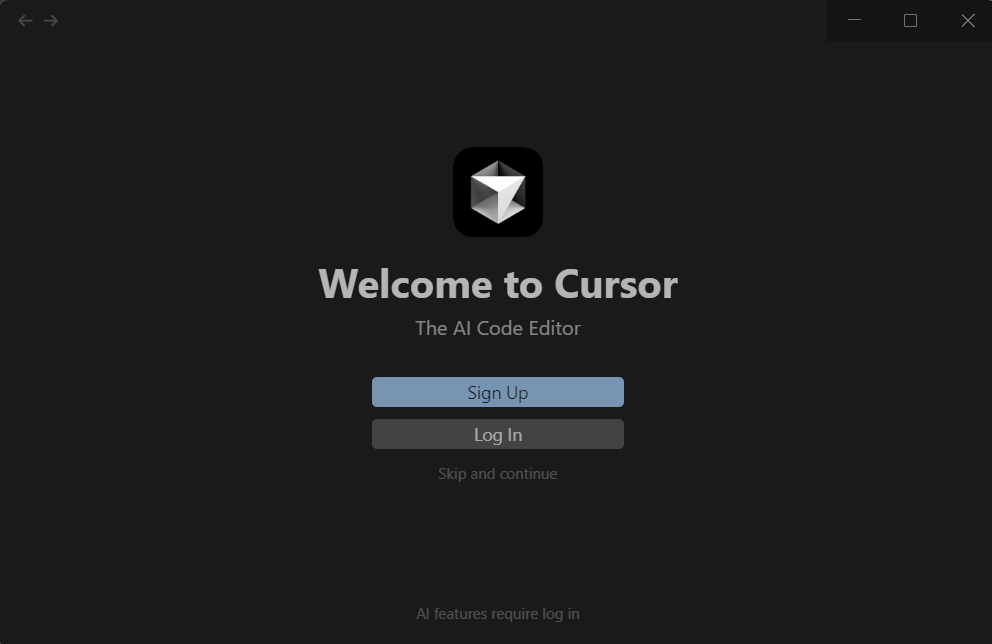
Create Your Free Account
When Cursor opens for the first time, it'll ask you to create an account.
- Click "Sign Up"
- You can sign up with your Google account or email
- Choose the "Hobby" plan (it's free, no credit card required)
 Screenshot: The Cursor sign-up screen. Choose "Hobby" for the free plan. No credit card needed.
Once you're in, you'll see something that looks like this:
 Screenshot: What Cursor looks like when you first open it. A dark code editor with a sidebar on the left and a welcome tab.
Don't worry if it looks intimidating. We're about to make it very friendly.
Step 3: Create Your First Project
Now we're going to set up a folder for your portfolio website. Think of this like creating a new notebook for a class. It keeps everything organized.
Create a Project Folder
- On your computer, create a new folder somewhere easy to find. For example:
- Windows:
C:\Users\YourName\Documents\my-portfolio - Mac:
/Users/YourName/Documents/my-portfolio
- Windows:
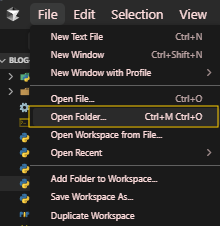
- In Cursor, click File → Open Folder
- Navigate to the folder you just created and click "Select Folder"
 Screenshot: File → Open Folder in Cursor. Navigate to your new "my-portfolio" folder and open it.
You should now see your empty folder in the sidebar on the left side of Cursor. Perfect. We're ready to build.
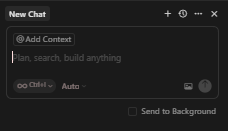
Step 4: Meet Your AI Assistant
Here's where the magic happens. Cursor has a built-in AI chat that you can talk to just like you'd talk to a friend. This is where you'll describe what you want, and the AI will write the code.
Open the AI Chat
Press Ctrl + L (or Cmd + L on Mac) to open the AI chat panel. You'll see a text box where you can type messages.
 Screenshot: The AI chat panel in Cursor. It appears on the right side of the editor. This is where you'll type your prompts.
This is your new best friend. Let's start talking to it.
Step 5: Build Your Portfolio Website (The Fun Part)
We're going to build your portfolio website in stages. Each stage, you'll type a message to the AI, it'll generate the code, and you'll see the result. It's like giving instructions to a really fast assistant.
The Golden Rules of Prompting
Before we start, here are the most important tips for getting great results when vibe coding:
- Be specific. "Make me a website" is okay. "Make me a personal portfolio website with a dark blue background, my name in white at the top, an about me section, and a gallery of my projects" is much better.
- One thing at a time. Don't try to build everything in one prompt. Break it down into steps.
- Describe what you see, not how to code it. You don't need to say "use CSS flexbox." Just say "put these three items side by side."
- If it's not right, tell it what's wrong. "The text is too small" or "move the photo to the left" works perfectly.
Stage 1: Create the Basic Structure
Type this into the AI chat (feel free to replace the details with your own information):
Your prompt: "Create a personal portfolio website using HTML and CSS. I want a modern, clean design with a dark navy background (#0a192f) and light text. Include these sections:
- A hero section at the top with my name "Alex Johnson" in large text and a subtitle that says "Student | Creator | Future Developer"
- An About Me section with a placeholder for a paragraph about myself
- A Projects section that shows 3 project cards in a grid
- A contact section at the bottom with links to social media Make it responsive so it looks good on phones too. Save this as index.html."
Press Enter and watch the magic happen.
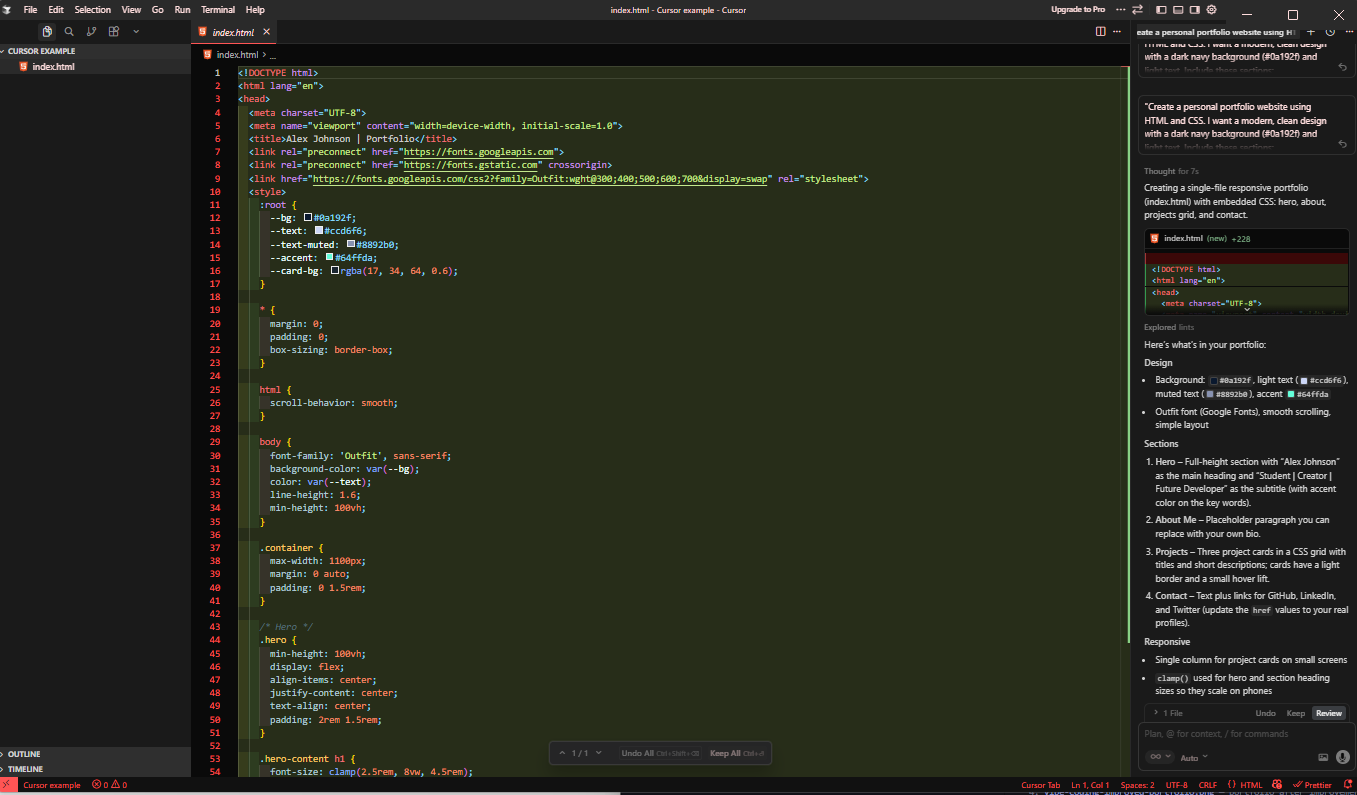 Screenshot: After entering your first prompt, Cursor's AI generates the full HTML and CSS code. You'll see it appear in the editor. Don't worry about understanding every line.
The AI will generate an entire HTML file with CSS styling. It might look like a wall of code, but you don't need to understand any of it right now. Click "Accept All" to save the code to your project.
Stage 2: See Your Website
Now let's see what you just built!
- Find the
index.htmlfile in your sidebar - Right-click on it
- Select "Open in Browser" or simply drag the file into your web browser (Chrome, Firefox, Edge, any will work)
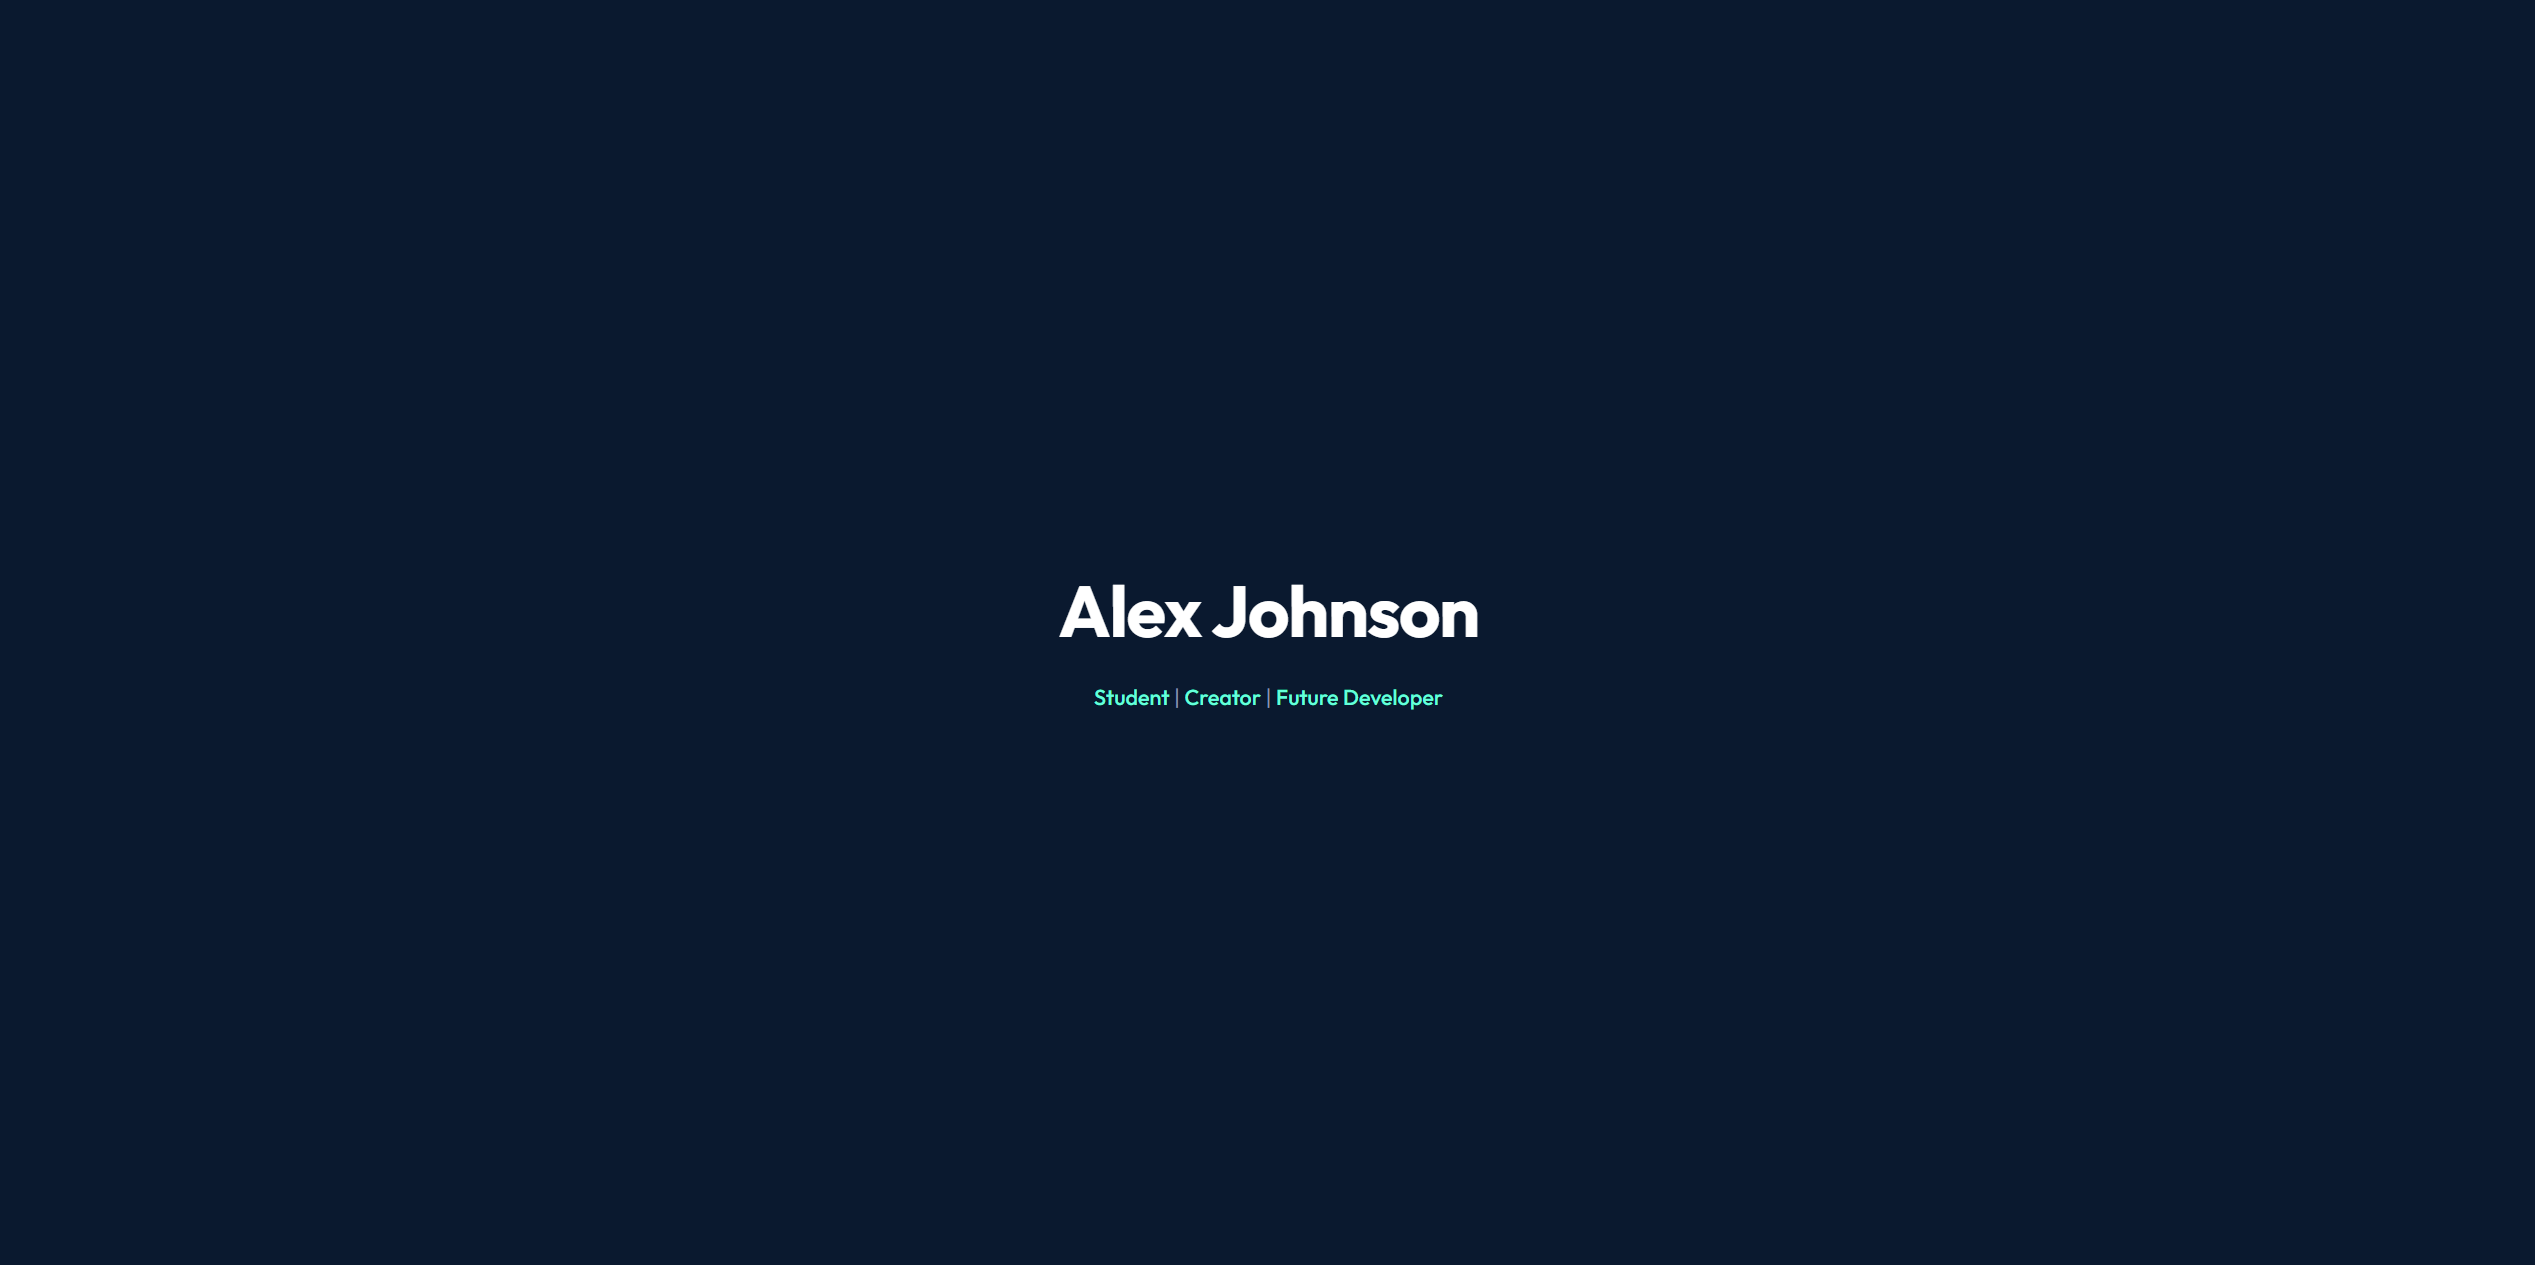 Screenshot: Your portfolio website open in a web browser for the first time. You should see a dark navy page with your name, an about section, project cards, and a contact section. It won't be perfect yet, and that's okay!
You just built a website. Seriously. Take a second to appreciate that.
Stage 3: Make It Your Own
Now let's customize it. Go back to the AI chat and start making changes. Here are some prompts you can try:
Add a profile photo:
"Add a circular profile photo at the top of the page next to my name. Use a placeholder image for now from picsum.photos."
Improve the project cards:
"Update the project cards to have a hover effect where they slightly lift up and get a subtle glow. Give each card a placeholder image, a title, and a short description."
Add smooth scrolling and animations:
"Add smooth scrolling when clicking navigation links. Also add a fade-in animation so each section appears as the user scrolls down the page."
Customize colors:
"Change the accent color to a bright teal (#64ffda). Use this color for buttons, links, and highlights throughout the page."
 Screenshot: Your portfolio after several rounds of AI-assisted improvements. Profile photo, animated project cards with hover effects, and a teal accent color. Looking much more polished!
Stage 4: Add Real Content
Now it's time to make it truly yours. Replace the placeholder text:
"Replace the About Me placeholder with this text: 'Hi! I'm Alex from Chicago and I love building things with technology. When I'm not coding, you'll find me playing basketball, making music, or watching way too many YouTube videos about space. I'm currently learning web development and AI, and I'm excited to share my projects with the world.'"
"Update the three project cards with these projects:
- Title: 'Weather App' - Description: 'A simple weather app that shows the forecast for any city. Built with vibe coding in one afternoon.'
- Title: 'Quiz Game' - Description: 'A fun trivia quiz I made for my friends. Features 20 questions about movies and music.'
- Title: 'Study Timer' - Description: 'A Pomodoro-style study timer with calming background sounds. Helps me focus during homework.'"
Stage 5: Polish and Perfect
Here are some finishing touches you can ask the AI to add:
"Add a navigation bar at the top that sticks to the top of the page when you scroll. Include links to each section: Home, About, Projects, Contact."
"Add a footer at the very bottom with the text '© 2026 Alex Johnson. Built with vibes and AI ✨' and small icons linking to GitHub, Twitter, and LinkedIn."
"Make the entire website have a smooth, professional feel. Add subtle gradient backgrounds to sections, use modern fonts from Google Fonts, and make sure everything is properly spaced and aligned."
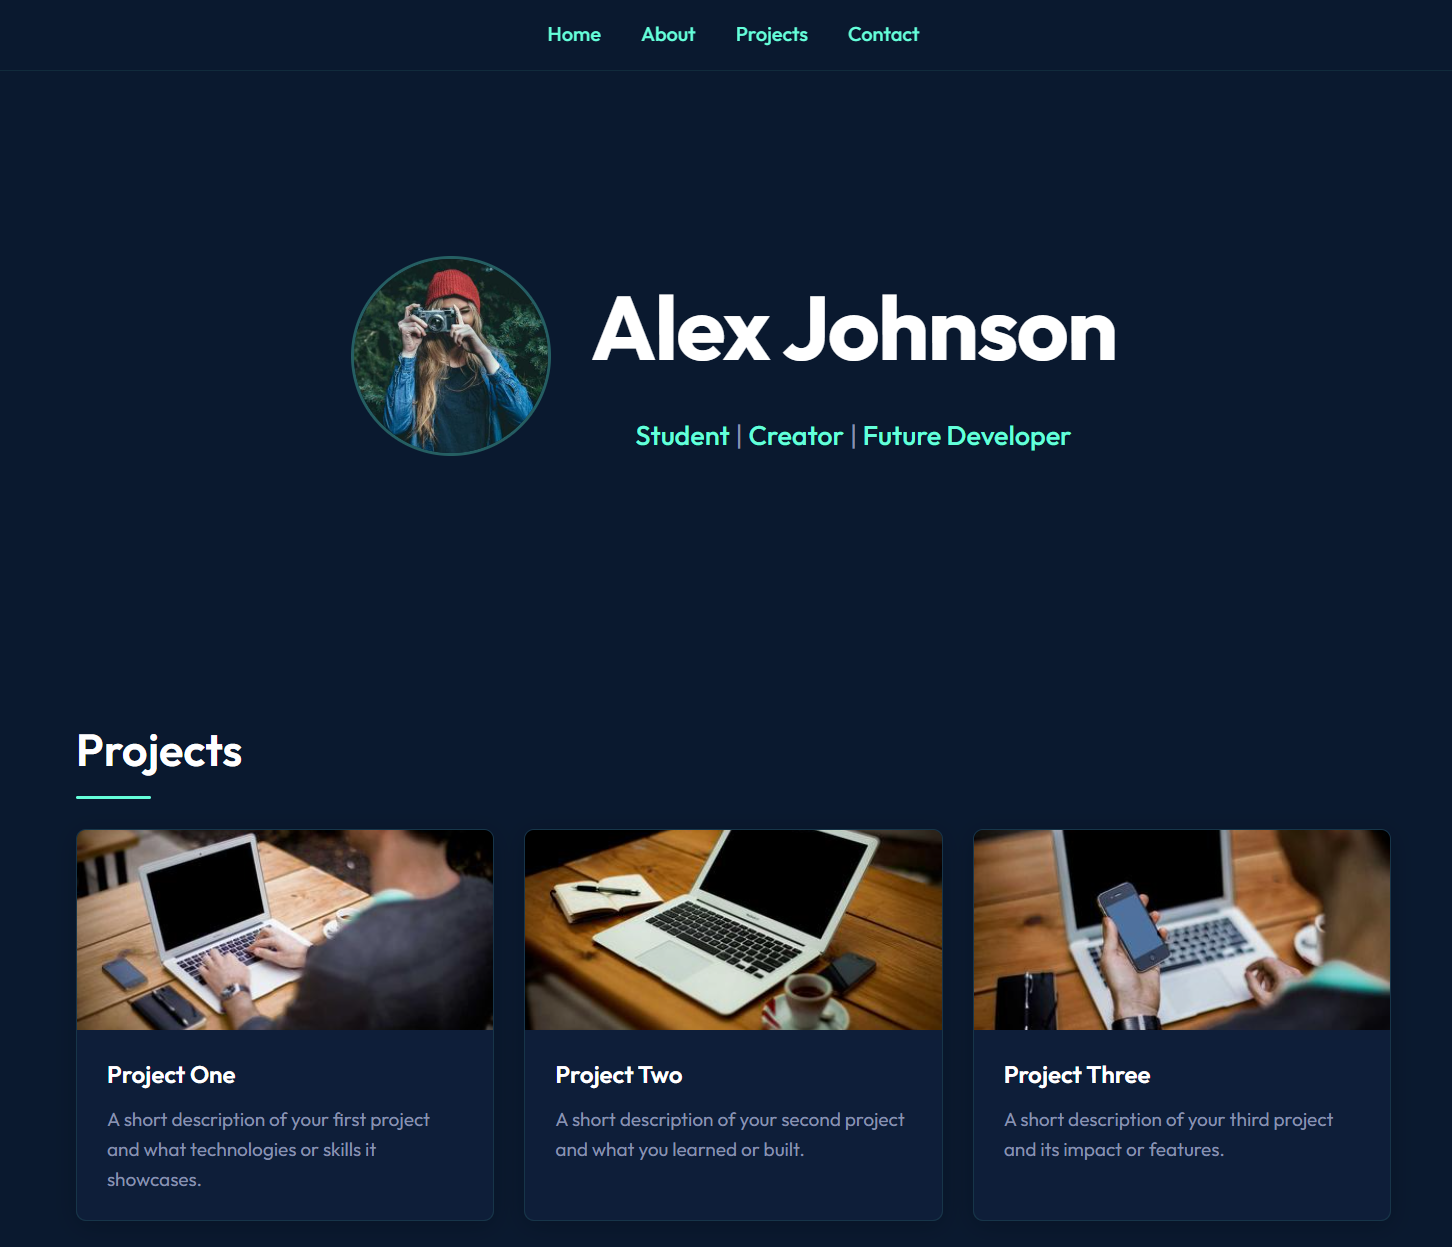
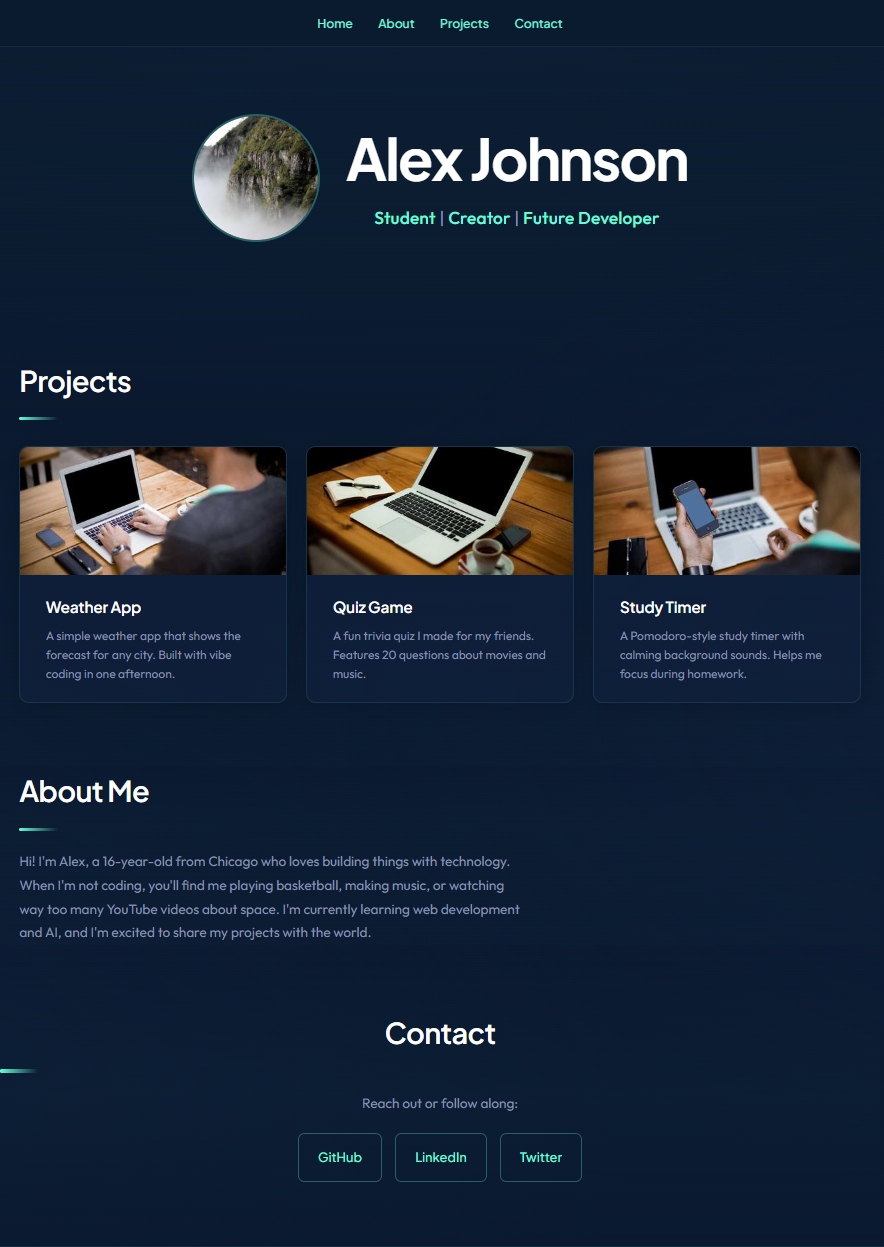 Screenshot: The completed portfolio website. A polished, professional-looking personal site with navigation, animations, project cards, and social links. You built this entirely by talking to an AI!
How ready is your business for AI? Take our free 2-minute assessment and get a personalized score with actionable recommendations.
Take the AssessmentStep 6: Put Your Website on the Internet (For Free)
You've built a website on your computer. Now let's put it online so anyone can see it. We'll use GitHub Pages, which is completely free.
What's GitHub?
GitHub is like Google Drive but for code. Developers use it to store, share, and collaborate on projects. Don't worry, you don't need to understand everything about it right now.
Set Up GitHub
- Go to github.com and create a free account
- Click the "+" icon in the top right corner and select "New repository"
- Name your repository
my-portfolio - Make sure it's set to Public
- Click "Create repository"
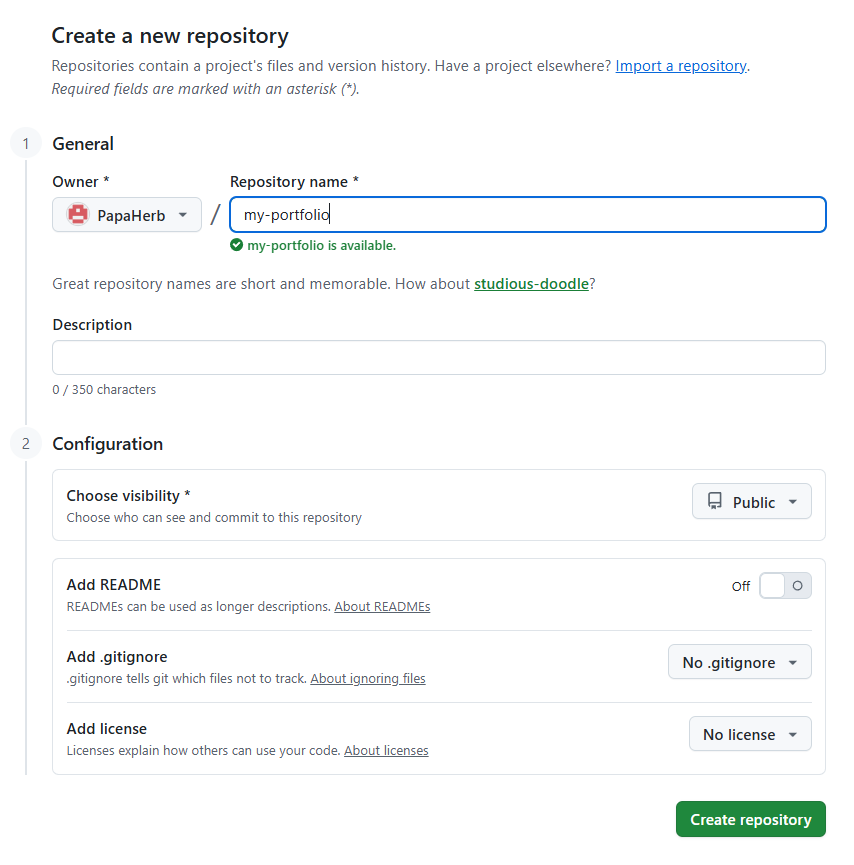 Screenshot: The "Create a new repository" page on GitHub. Name it "my-portfolio", keep it public, and click "Create repository".
Upload Your Files
The simplest way to get your files on GitHub:
- On your new repository page, click "uploading an existing file"
- Drag your
index.htmlfile (and any other files like images or CSS) into the upload area - Click "Commit changes"
Enable GitHub Pages
- Go to your repository's Settings tab
- Scroll down to "Pages" in the left sidebar
- Under "Source," select "main" branch
- Click Save
- Wait about 1-2 minutes
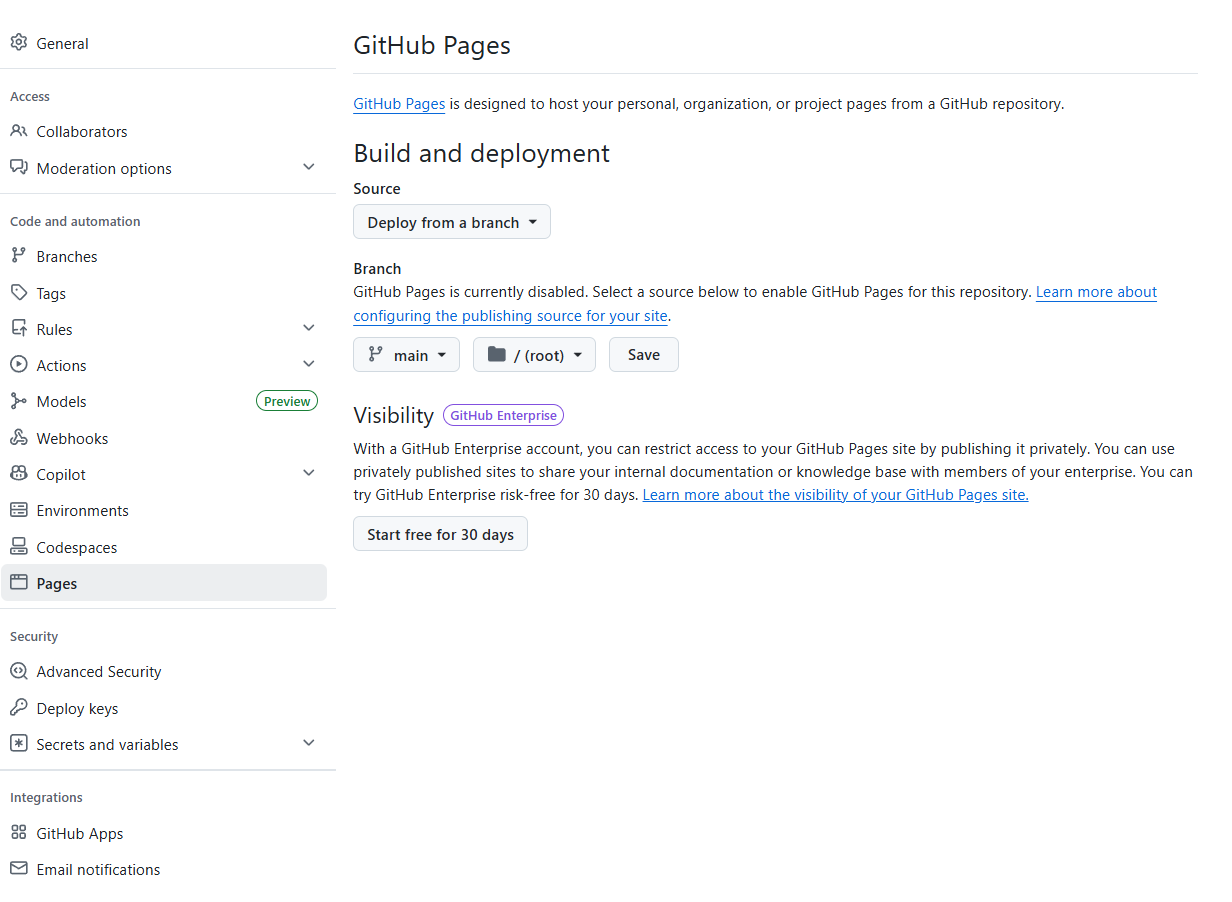 Screenshot: The GitHub Pages settings. Select "main" branch as the source and click Save. Your site will be live in minutes.
Your website is now live at: https://yourusername.github.io/my-portfolio
Share that link with your friends, put it in your social media bio, or add it to college applications. You just built and deployed a real website.
Level Up: What to Build Next
Now that you've got the basics down, here's where it gets exciting. Your first portfolio was just the beginning. Here are some ideas to keep your momentum going:
As you start building more complex projects, be aware of the long-term maintenance challenges that come with AI-generated code — we cover that honestly in The Vibe Coding Hangover.
Beginner Projects (Week 1-2)
- A quiz game — Ask the AI to build an interactive trivia game on any topic you love
- A to-do list app — Simple but practical, and teaches you about user interaction
- A link-in-bio page — Like Linktree but custom-made by you
Intermediate Projects (Week 3-4)
- A blog — Build a simple blog where you can post updates about your learning journey
- A calculator — Not just basic math, but something unique like a GPA calculator or a tip splitter
- An AI chatbot — Use a free AI API to build a chatbot that answers questions about a topic you love
Advanced Projects (Month 2+)
- A full web app — Something people can actually use, like a study group finder or a playlist generator
- A browser game — Tic-tac-toe, memory matching, or even a simple platformer
- A tool that solves a real problem — What annoys you? Build something that fixes it
Pro Tips from the Vibe Coding Community
These tips come from experienced vibe coders who've been building with AI tools since the early days:
1. Start with a Plan (Even a Simple One)
Before you start prompting, write down:
- What you're building (one sentence)
- Who it's for (yourself? friends? everyone?)
- What it does (list 3-5 features)
This is sometimes called a "mini PRD" (Product Requirements Document), and it helps the AI give you much better results.
2. Don't Try to Build Everything at Once
The biggest mistake beginners make is writing one massive prompt that tries to create an entire app. Break it down:
| Instead of this... | Try this... |
|---|---|
| "Build me a complete social media app" | "Create a homepage with a feed of posts" |
| "Make a full e-commerce store" | "Build a product listing page with 6 items in a grid" |
| "Create a game" | "Make a simple canvas with a square that moves with arrow keys" |
3. Talk to the AI Like a Human
You don't need to use technical language. These all work:
- "The text looks squished on my phone, can you fix that?"
- "I don't like the yellow, make it more of a soft orange"
- "The button should do something when I click it"
- "This doesn't look right. The image is way too big"
4. Learn by Reading (A Little)
Here's a secret that'll make you way better at vibe coding: start reading the code the AI writes. You don't need to understand everything. But over time, you'll notice patterns:
- "Oh,
color: #64ffdais what makes text that teal color" - "So
display: flexis what puts things side by side" - "That
@mediathing is what makes it work on phones"
You'll accidentally learn to code. And that knowledge will make your prompts even better.
5. Save Versions of Your Work
Every time you get your project to a good state, save a copy. You can do this with GitHub (look up "git commits") or simply by copying your project folder. This way, if you break something, you can always go back.
Tools and Resources to Bookmark
Here's your starter kit of resources to keep learning:
Free Learning Resources
| Resource | What It Is | Link |
|---|---|---|
| Replit Vibe Coding 101 | Free course by Replit + Andrew Ng on getting started | learn.replit.com |
| DataCamp Vibe Coding with Replit | Structured course for beginners | datacamp.com |
| freeCodeCamp | Free coding curriculum if you want to learn the fundamentals | freecodecamp.org |
| Vibe Codex | Directory of prompts and templates for vibe coding | vibecodex.io |
| Tech.co Free AI Courses | Collection of free courses for vibe coding | tech.co |
Communities to Join
- r/vibecoding on Reddit — active community sharing tips and projects
- Cursor Discord — get help from other Cursor users
- GitHub — follow other vibe coders and see their projects
- YouTube — search "vibe coding tutorial 2026" for video walkthroughs
Useful Tools
| Tool | Purpose | Link |
|---|---|---|
| GitHub | Store and share your code for free | github.com |
| Netlify | Another free way to host websites | netlify.com |
| Figma | Design your ideas visually before building (free tier) | figma.com |
| ChatGPT / Claude | AI assistants to brainstorm ideas and get help | chat.openai.com / claude.ai |
| Unsplash | Free, high-quality images for your projects | unsplash.com |
Common Mistakes (And How to Avoid Them)
Every beginner hits the same bumps. Here's how to avoid them:
"The AI gave me an error and I don't know what to do"
Copy the error message and paste it right back into the AI chat. Seriously, just say "I'm getting this error:" and paste it. The AI is great at fixing its own mistakes. This is probably the most useful tip in this entire guide.
"My website looks different on my phone"
Tell the AI: "This doesn't look right on mobile. Can you make sure it's fully responsive?" The AI understands what responsive design means and will fix the layout.
"I used all my free AI requests"
Free plans have limits. Here's how to stretch them:
- Write detailed prompts so you need fewer back-and-forth exchanges
- Use the code completion features (they have separate, higher limits)
- If you're on Cursor, the Hobby plan refreshes every month
- Try switching between tools (use Cursor for coding, ChatGPT or Claude for brainstorming)
"I have no idea what to build"
Start by solving a problem you actually have:
- Annoyed that you can't find a good study timer? Build one.
- Wish you had a cleaner way to organize your bookmarks? Build it.
- Want a simple site to share your art, music, or photography? That's your project.
The best projects come from real frustration.
The Bigger Picture: Why This Matters
Vibe coding isn't just about building websites or apps. It's about a fundamental change in who gets to create technology.
For decades, building software required years of specialized education. That meant that the people who could create technology were a very small group. Vibe coding is opening that door to everyone, including you.
Here's what's exciting about learning this now:
- For school: Build interactive projects instead of boring slideshows. Imagine presenting a working app for your science fair or history project.
- For college applications: Having a portfolio of real projects you've built shows initiative and creativity in a way that grades alone can't.
- For future careers: Whether you end up in tech or not, understanding how to build with AI tools will be valuable in almost every field.
- For right now: You can build things that are genuinely useful to you and your friends today.
You're not just learning a skill. You're joining a movement that's reshaping how the world creates technology.
Your Challenge: Build Something This Week
Here's your homework (the fun kind):
- Download Cursor (or open Bolt.new if you can't install software)
- Follow the walkthrough in this guide to build your portfolio
- Deploy it to GitHub Pages
- Share it. Post the link somewhere, show a friend, put it in your bio
- Build one more thing. Pick any project idea from the list above and give it a shot
The hardest part is starting. You've already read this far, which means you're ready. Open Cursor, type your first prompt, and see what happens.
You might surprise yourself.
Have questions about vibe coding or want help with your first project? Reach out to us at The Biz Spark. We love helping new creators get started.
The Biz Spark Guide
Want the complete framework for working with AI effectively? "How to Actually Get Work Done With AI" covers the supervision mindset, the TCREI framework, real workflows, and a case study where we took AI approval rates from 20% to 80%.
Get the Guide - $20